How to Repair a Copper Pinhole Leak

Got a pinhole leak? Join Ben Goheen, master plumber and owner of The Neighborhood Plumber, as he walks through how to fix copper pinhole leaks with confidence.
While they can seem intimidating, these repairs are surprisingly simple using SharkBite Max push‑to‑connect fittings and SharkBite PEX pipe. Watch this guide for pro tips on making a long‑lasting, secure connection.
What Causes Pinhole Leaks?
When calcium and heavy metals build up in your pipes, it creates scratches that weaken the inner wall of copper pipe, causing small holes that we call pinhole leaks. Other possible causes are excessive water pressure, formicary corrosion from VOCs in the air, and improper electrical grounding.
These copper-weakening properties mean it’s best to replace the affected area with PEX-a pipe. For a pinhole leak-proof solution for years to come, we recommend doing a full repipe with PEX pipe, especially if you notice multiple pinhole leaks, a higher water bill, and lower water pressure.
How To: Quickly Transition from Copper to PEX with SharkBite
Gather Your Materials
- SharkBite Max Couplings
- SharkBite PEX-a Pipe
- Deburr Tool
- PEX Cutters
- SharkBite Max Slip Coupling
- Single Nail Clamp
- Tape measure
- Marker
Repairing Pinhole Leaks: Step-by-Step
1. Prep and Cut the Pipes
Turn off the water and drain the system first. Mark the copper pipe about 6 inches on either side of the leak and cut out the damaged section using your copper cutters. Then, use the SharkBite Max deburr tool to smooth the inside and outside of the copper pipe. This ensures a clean connection and prevents damage to the SharkBite o-ring.
Read More: How to Turn Off Main Water Valve for Plumbing Repairs
Next, measure the distance between your two cut ends of copper pipe. Cut your PEX-a pipe to this length with PRO PEX cutters, deburr the ends with the deburr tool, and mark the insertion depth with your marker. Ensure that you are using the SharkBite Max side of the deburr and gauge tool to measure the insertion depth.
2. Install SharkBite Max Fittings
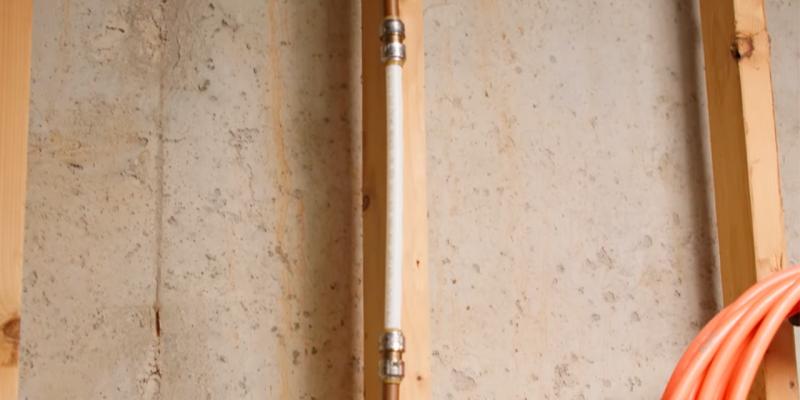
Push the SharkBite Max fittings onto the copper pipes, then insert the new PEX pipe into the space between the couplings. Ensure a smooth, straight pushing motion until the pipe is fully bottomed out in the fitting, reaching the mark you made on the PEX pipe.
Watch: How To: Install SharkBite Max Fittings
3. Secure and Test
Use SharkBite single nail clamps to strap the new pipe to a stud so it doesn't move. Finally, turn the water back on, bleed the air from the lines, and check for leaks.
Alternative Method
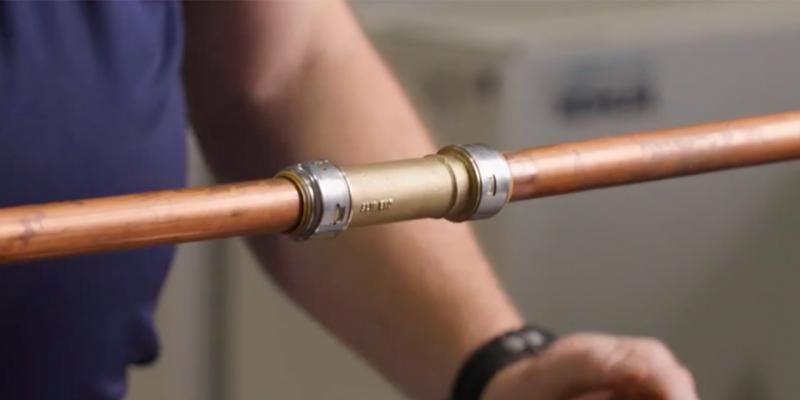
Another great option for quickly fixing pinhole leaks is to use a SharkBite Max Slip Coupling. This method is great for tight spaces or if it is an emergency repair.
To install, cut out the area around the pinhole leak and use the SharkBite Max deburr and gauge tool to deburr both ends and to mark the insertion depth on one side of the pipe. Then, slide the coupling onto the other side of the pipe and slide it over to the other pipe to bridge the gap without needing extra flexibility.