How to Install A New Toilet

You need a new toilet, but how do you install it yourself?
Join Ben Goheen, Master Plumber and owner of The Neighborhood Plumber, as he walks through how to install a new toilet using RWC's family of brands like SharkBite, EZ-Flo and Eastman.
Why Replace Your Toilet?
There are a few warning signs that you need a new toilet, so take action if you are notcing more than one of the following:
- Worn internal parts: dry-rotted gaskets and bolts inside the tank.
- Leaking valves: supply valve won’t turn off completely.
- High water bill: if your tank empties and refills on its own, it’s costing you.
Gather Your Materials
- Eastman flanged wax ring
- Eastman Toilet Supply line
- SharkBite depth & deburr tool
- SharkBite Max supply stop
- Cutters for either PEX, copper, or CPVC (depending on your pipe type)
- Tape measure
- Marker
- Tounge and groove pliers
- 6-in-1 screwdriver
- Razor blade
- Scraper
- Paper towels
- Wet vac
Step-by-Step Installation
Replacing a toilet can be an easy fix if you prep it correctly and should only take one to two hours.
Choose the correct toilet size
Start by picking out the correct size toilet to replace your current one. Measure the rough-in distance, depth, and rim height. This will give you the amount of space you have available for your new toilet. Ensure your new toilet is within these bounds.
2. Shut Off & Drain
Turn off the water supply by turning off the supply line on the toilet, then turning the water off at the main or meter. Flush the toilet to drain the remaining water, then vacuum up the rest with a wet vac.
Learn more: How to Turn Off Main Water Valve for Plumbing Repairs
3. Disassembly
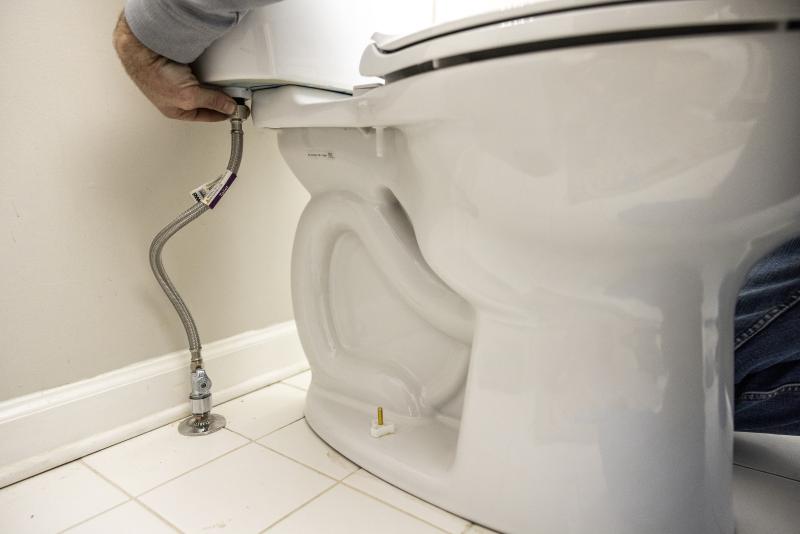
Remove the tank first by unscrewing the bolts at the bottom of the tank. Then, disconnect the supply line and floor bolts with tonge and groove pliers. If the base is caulked, use a razor blade and scraper to gently loosen the seal and remove the old cauk from the floor.
Then, use your tonge and groove pliers to remove both the supply line and the stop valve from the pipe.
4. Prep & Install
In this installation, Ben is working with copper pipe and wants to install a SharkBite Max push-to-connect supply stop. To prep the install, he used a SharkBite depth and deburr tool and sandpaper to deburr the pipe and mark the correct insertion depth. After you marked the pipe, push your SharkBite Max stop valve onto the pipe. Then, slide the protective chrome cover onto the pipe. Secure the Eastman supply line to the stop by tightening it with pliers.
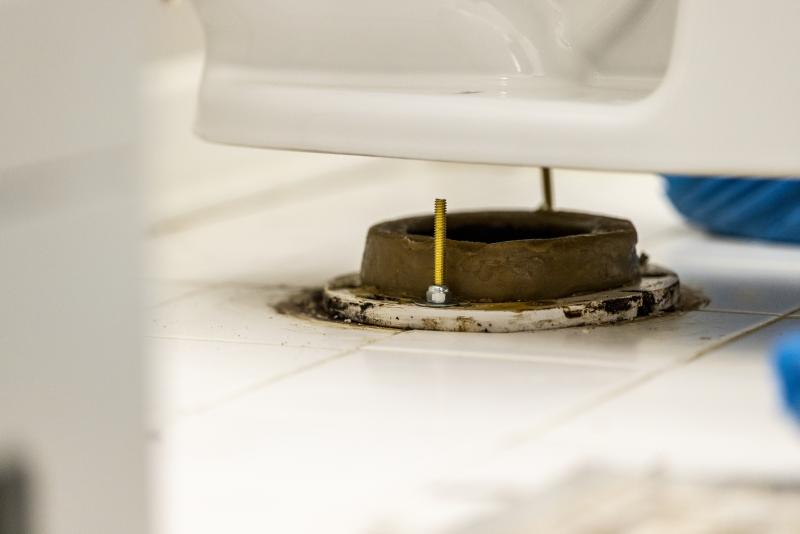
Next, remove the old wax, caulk, and debris from the flange to ensure a clean, leak-free surface for the new seal. If your flange is higher than the floor, use a small wax seal, if it’s level, use regular and if it’s lower, use jumbo. Then, place your new wax ring on the flange, install your bolts, carefully position the toilet over the bolts, and press down evenly to create a solid seal.
Next, hand tighten he bolts on the bottom of the tank, place the tank lid back on, and carefully tighten the seat onto the toilet. and seat and turn the water back on slowly to test for leaks. Carefully ighten the supply line to the bottom of the tank and ease the water back on at the meter. At the toilet, ease the supply stop on and check the water level inside the tank. If the water level is too high, adjust the fill valve so that it stops the water from entering the toilet earlier. Do this by turning the flap on the fill valve counterclockwise.
Finish the install by cutting the bolts down on each side of the toilet and adding your china caps on top. Then, add a bead of silicone around the base for stability.